Varying Vagrant Vagrants: Guide to Local WordPress Development
TL;DR
- Varying Vagrant Vagrants (VVV) is an open-source tool that creates a consistent, reproducible local WordPress development environment on any OS using Vagrant and VirtualBox.
- VVV is popular because it eliminates inconsistent environments, supports team collaboration, and makes debugging and onboarding easier by mirroring live server stacks.
- It comes pre-configured with essential software: Nginx, MariaDB, multiple PHP versions, MailHog, and WP-CLI, and includes default and custom WordPress site templates.
- Installation involves installing prerequisites (VirtualBox, Vagrant, Git), cloning the VVV repository, and running simple commands to launch a ready-to-use local dev environment.
- Developers can easily manage multiple projects, custom domains, and even multisite setups via YAML configuration files, with automatic provisioning and SSL certificate generation.
- Best practices include frequent updates, leveraging WP-CLI, version-controlling all sites, and troubleshooting using Linux server tools—with VVV dramatically improving workflow and consistency for professional WordPress development.
If you’ve been developing WordPress sites for any length of time, you’ve likely faced the classic “it works on my machine” problem. Inconsistent development environments can turn a simple project into a debugging nightmare, wasting hours and causing friction within teams. Over my ten years in development, I’ve tried nearly every local setup imaginable, and one tool has consistently stood out for its power and reliability: Varying Vagrant Vagrants (VVV).
VVV solves the environmental consistency problem by creating a reproducible, Linux-based server environment right on your local machine, whether you’re on Windows, macOS, or Linux. It’s an open-source project specifically tailored for WordPress development, giving you a professional-grade server stack without the headache of manual configuration.
This guide is your deep dive into VVV. We’ll explore what it is, how it works with Vagrant, and walk through the entire process from installation to advanced configurations like WordPress multisite. By the end, you’ll understand why VVV is a game-changer for serious WordPress developers and how you can use it to build better websites, faster.
What Is Varying Vagrant Vagrants (VVV)?

At its core, Varying Vagrant Vagrants is a pre-packaged Vagrant configuration designed to create a robust local development environment for WordPress. Think of it as a development server in a box, ready to go.
Why Developers Prefer VVV for WordPress
In my experience, developers gravitate toward VVV for three main reasons: consistency, power, and community. Before tools like VVV, setting up a local server meant installing and configuring Apache or Nginx, PHP, and MySQL directly on your computer—a process that varied wildly between operating systems and was prone to conflicts with other software.
VVV eliminates this chaos. It provides a standardized, isolated environment that perfectly mirrors a live production server. This means every developer on a team, regardless of their local OS, works with the exact same server stack. When an agency adopts VVV, they streamline their workflow, reduce onboarding time for new developers, and eliminate environment-related bugs.
It’s not just for teams, either. As a freelance developer, VVV gives me the confidence that my code will behave predictably when deployed. The environment is managed through simple configuration files, making it easy to version control my entire setup alongside my project code.
Key Features of VVV
Varying Vagrant Vagrants comes packed with features that are essential for modern WordPress development:
- Pre-installed Software: It includes Nginx, MariaDB (a fork of MySQL), multiple PHP versions, Memcached, and MailHog for email testing.
- Default WordPress Sites: Out of the box, VVV sets up a standard WordPress installation (
one.wordpress.test) and a development version (trunk.wordpress.test) for testing against the latest WordPress core. - WP-CLI Integration: The powerful WordPress Command-Line Interface is included, allowing you to manage themes, plugins, users, and more directly from your terminal.
- Custom Site Provisioning: You can easily add your own custom projects, complete with unique domain names, databases, and WordPress configurations, using a simple YAML file.
- Extensibility: VVV is built to be extended. You can add custom provisioning scripts to install other tools like Composer, PHPUnit, or Node.js.
How Does VVV Work with Vagrant?

To understand VVV, you first need to understand Vagrant. Vagrant is a tool for building and managing virtual machine environments in a single, easy-to-use workflow. It acts as a wrapper around virtualization software like VirtualBox or Docker.
Role of Vagrant in Creating Reproducible Environments
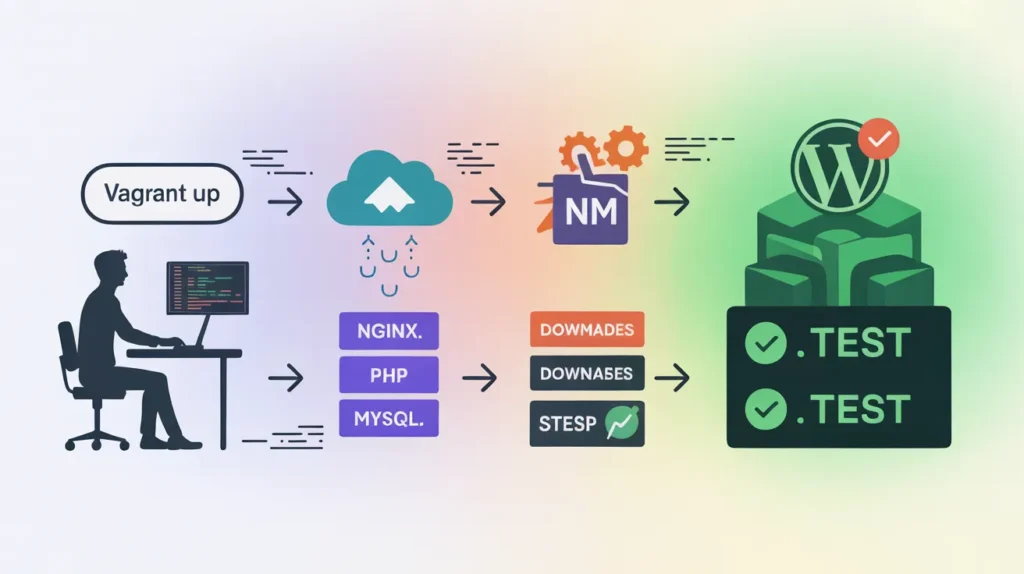
Vagrant reads a configuration file called a Vagrantfile which defines the type of machine to create, what software to install, and how to configure it. When you run vagrant up, it downloads a “box” (a base virtual machine image) and runs provisioning scripts to set up the environment exactly as defined.
This process ensures that every time you create the environment, it’s identical. This is the magic of “infrastructure as code”—your server setup is defined in a text file that can be shared and version-controlled.
VirtualBox, Docker, and Other Provider Options
Vagrant supports different “providers,” which are the underlying technologies that run the virtual machines. The most common provider for VVV is VirtualBox, a free and open-source virtualization product from Oracle. It’s the default and recommended provider for most users.
Other providers exist, such as Hyper-V (for Windows), VMware, and Docker. While it’s possible to use VVV with some of these, the community support and documentation are strongest for VirtualBox.
How VVV Provisions a WordPress Development Stack
VVV provides a master Vagrantfile and a collection of shell scripts that automate the entire setup process. When you run vagrant up, these scripts execute inside the virtual machine to:
- Update the base operating system (usually Ubuntu).
- Install server software like Nginx, MariaDB, and PHP.
- Configure Nginx to serve multiple websites with local domain names (e.g.,
my-project.test). - Create databases for each WordPress site.
- Download and install WordPress core files.
- Install essential tools like WP-CLI and Git.
This automated provisioning is what makes the VVV WordPress local development experience so seamless.
How to Install Varying Vagrant Vagrants on Your System
Getting started with VVV involves installing a few prerequisites and then cloning the VVV repository. Let’s walk through the steps for a VVV installation guide.
Prerequisites for Windows, Linux, and Mac
Before you can use VVV, you need to install the following software:
- VirtualBox: Download and install the latest version from the official VirtualBox website.
- Vagrant: Download and install the appropriate version for your OS from the Vagrant website.
- Git: VVV is managed through a Git repository. If you don’t have Git installed, you can get it from the official Git website.
- Vagrant Host Updater (Recommended): This Vagrant plugin automatically manages your computer’s
hostsfile, which maps the local.testdomains to your virtual machine’s IP address. Install it by running this command in your terminal:vagrant plugin install vagrant-hostsupdater
Step-by-Step Installation Guide
Once the prerequisites are installed, you can set up VVV:
- Clone the VVV Repository: Open your terminal and navigate to the directory where you want to store your development environments (e.g.,
~/Documents/Code/). Then, clone the VVV repository from GitHub:git clone -b stable https://github.com/Varying-Vagrant-Vagrants/VVV.git vvv
This command downloads VVV into a folder namedvvv. - Navigate into the VVV Directory:cd vvv
- Start the Virtual Machine: Now for the exciting part! Run the command to boot and provision your new environment. This may take some time on the first run as it downloads the virtual machine box and installs all the software.vagrant up
You may be prompted for your administrator password so thatvagrant-hostsupdatercan modify yourhostsfile.
Verifying Installation and Running Your First VM
Once the vagrant up command finishes, your VVV environment is running! To verify that everything is working correctly, open your web browser and navigate to http://vvv.test.
You should see the VVV dashboard, which provides links to the default WordPress sites and various developer tools. You can also visit http://one.wordpress.test to see the default WordPress installation. Congratulations, you now have a fully functional local WordPress dev environment!
How to Configure VVV for Your WordPress Projects
The default sites are great, but the real power of VVV lies in its ability to host your own custom projects. This is managed through a configuration file.
Editing vvv-custom.yml or Vagrantfile
VVV uses a file named config/vvv-custom.yml to define custom sites. This file is ignored by Git, so your personal project configurations won’t be committed to the main VVV repository. If this file doesn’t exist, you can create it by copying config/vvv-config.yml.
Adding Custom Sites and Databases
To add a new WordPress site, open config/vvv-custom.yml and add a new entry under the sites section. Here’s an example of what that looks like:
sites:
  my-awesome-project:
    repo: https://github.com/your-username/my-awesome-project.git
    hosts:
      - my-awesome-project.test
This configuration tells VVV to:
- Create a site named
my-awesome-project. - Clone the specified Git repository into the
www/my-awesome-projectdirectory. - Set up the domain
my-awesome-project.testto point to it.
After saving the file, run vagrant reload --provision to apply the changes. VVV will automatically create the new site directory, set up the Nginx configuration, and create a corresponding database.
Setting Up SSL Certificates Locally
VVV automatically generates self-signed SSL certificates for all sites, allowing you to develop using HTTPS. Simply navigate to https://my-awesome-project.test. Your browser will show a security warning because the certificate isn’t signed by a trusted authority, but you can safely proceed. This is crucial for testing features that require a secure connection.
How to Use VVV for Multi-site or Complex Projects
VVV is flexible enough to handle more than just standard WordPress installations.
Setting up WordPress Multisite
You can easily configure a site to be a WordPress multisite installation. In your vvv-custom.yml file, add the multisite: true option to your site definition:
sites:
  my-multisite:
    hosts:
      - my-multisite.test
    custom:
      multisite: true
After provisioning, VVV will configure wp-config.php with the necessary constants to enable multisite mode.
Managing Multiple Projects Efficiently
With VVV, you can run dozens of projects within a single virtual machine, each with its own isolated directory and database. This is far more efficient than running a separate VM for each project. To switch between projects, you just change the URL in your browser. The VVV virtual machine configuration is designed to handle this workload gracefully.
How to Troubleshoot Common VVV Issues
Even with a tool as robust as VVV, you might occasionally run into issues. Here are some common problems and their solutions.
VM Provisioning Errors
If vagrant up or vagrant provision fails, the error message in the terminal is your best clue. Often, it’s a network issue preventing a download or a typo in your vvv-custom.yml file. Carefully read the output to identify the script that failed. A common fix is to run vagrant provision again, as temporary network glitches are frequent.
Port Conflicts and Network Issues
Sometimes, another application on your computer might be using a port that VVV needs. The error message will typically indicate a port conflict. You can resolve this by either stopping the conflicting application or reconfiguring the port forwarding in your Vagrantfile.
Debugging PHP, MySQL, and WordPress Errors
Since VVV is a full Linux environment, you can debug just like you would on a live server. You can SSH into the virtual machine by running vagrant ssh. Once inside, you have access to all the server logs. For example, the Nginx error logs are located at /var/log/nginx/. You can also enable WP_DEBUG in your wp-config.php file to see WordPress-specific errors.
Best Practices for VVV Local Development
To get the most out of Varying Vagrant Vagrants, adopt these best practices into your workflow.
Keeping Environments Updated
VVV is an active project. To get the latest features and security fixes, you should periodically update your VVV installation. Navigate to your vvv directory and run:
git pull origin stable
vagrant provision
Version Control with Git and VVV
One of the biggest advantages of VVV is that your projects live in their own directories. This means you can manage each project as a separate Git repository. Your workflow should be: develop locally, commit your changes, and then push to a remote repository like GitHub or Bitbucket.
Using WP-CLI for an Efficient Workflow
Get comfortable with WP-CLI. It’s a massive time-saver. Need to install a plugin? vagrant ssh into the VM, navigate to your site’s directory, and run wp plugin install woocommerce --activate. Need to search-and-replace a URL in the database? wp search-replace 'old-url.com' 'new-url.dev'. Integrating WP-CLI will dramatically speed up your development tasks.
Elevate Your WordPress Development Today
Embracing Varying Vagrant Vagrants has been one of the most significant productivity boosts in my career as a WordPress developer. It provides the consistency needed for seamless team collaboration and the power required for complex projects. The initial setup might seem daunting, but the long-term benefits of faster development cycles, replicable environments, and integration with professional tools like Composer and PHPUnit are immeasurable.
By moving your projects to VVV, you’re not just adopting a new tool; you’re adopting a modern, professional workflow that will save you countless hours of debugging and configuration. I encourage you to install it, add your first custom site, and experience the difference for yourself.
And once your local development is running smoothly and you’re ready to move to staging or production, consider a reliable hosting partner. For production-ready WordPress hosting, providers like Skynethosting.net offer optimized environments to ensure your site performs at its best.
FAQs
What is Varying Vagrant Vagrants (VVV)?
Varying Vagrant Vagrants (VVV) is an open-source tool that gives you a ready-to-go local WordPress development environment. It uses Vagrant and VirtualBox to create a consistent server stack, making WordPress work the same way on any computer.
Why do developers choose VVV for WordPress projects?
How does VVV work with Vagrant and VirtualBox?
What does the VVV installation process look like?
Is it hard to add new WordPress projects to VVV?
Adding a project just means editing a YAML file to include your new site. After saving changes and running a quick command, VVV provisions the site for you—complete with its own database and local domain—making it painless to manage multiple projects.
Does VVV support advanced setups like multisite?
Absolutely! VVV lets you configure WordPress multisite easily by updating your site’s YAML settings. Need SSL or to run several complex projects together? VVV will handle provisioning, so each site functions independently within the same virtual machine.


