How to Set Up VPS Hosting: Complete Beginner-Friendly Guide
TL;DR
- VPS hosting provides a dedicated virtual environment with guaranteed resources, increased security, and full control, unlike shared hosting.
- Before setup, choose the right VPS plan based on your needs for vCPU, RAM, storage (preferably NVMe SSDs), and bandwidth for best performance.
- Access your VPS mainly using SSH for Linux or RDP for Windows, then verify your login and server status after connecting.
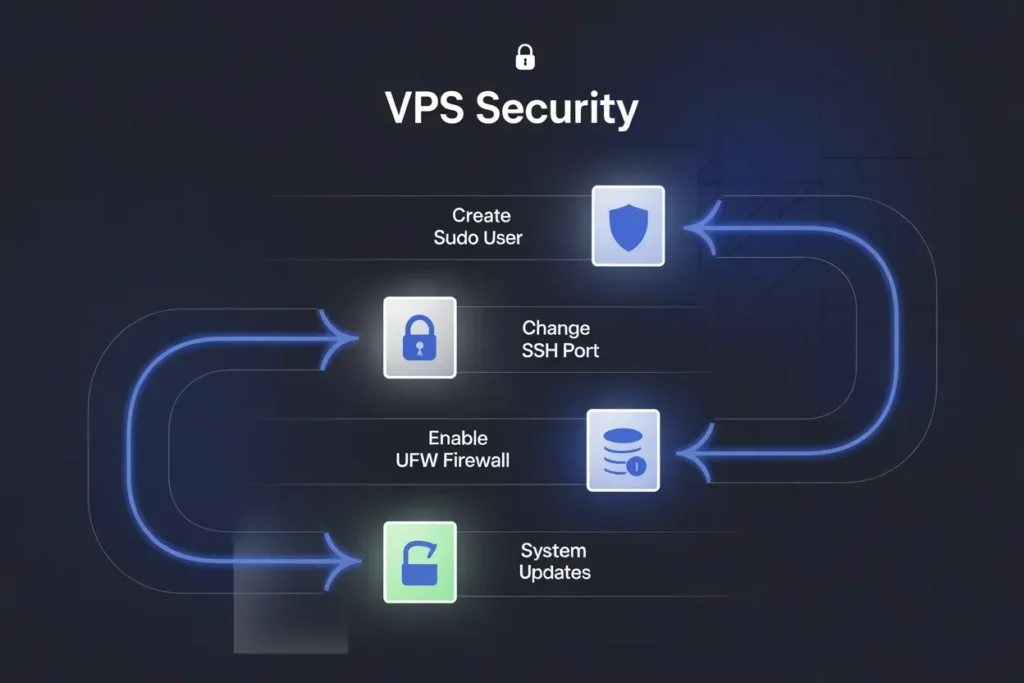
- Secure your VPS immediately by creating a sudo user, changing the SSH port, enabling SSH keys, setting up a firewall, and running system updates.
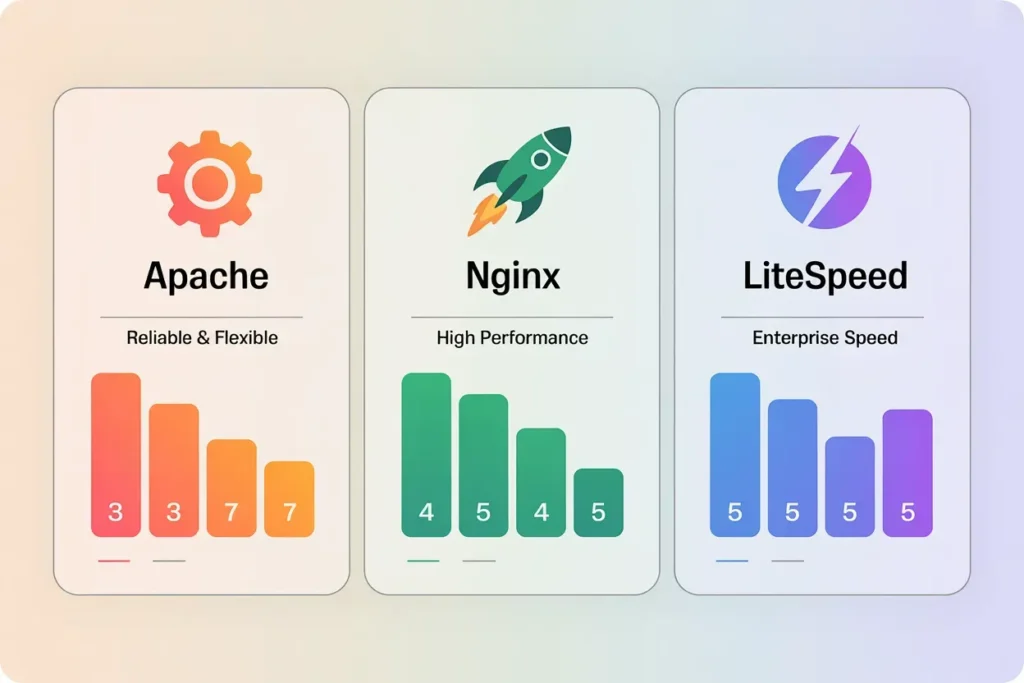
- Install a control panel (such as cPanel or free CyberPanel) or manually set up a web server (Apache, Nginx, LiteSpeed), then deploy your website via FTP/SFTP or Git.
- Optimize your VPS with caching, compression, regular backups, resource monitoring, and leverage fast NVMe storage and global datacenters if using SkynetHosting.net.
Taking the leap from shared hosting to a Virtual Private Server (VPS) can feel like a huge step. I remember my first time a mix of excitement and a little bit of fear. You’ve probably heard about the benefits: more power, better security, and full control. But then you’re faced with a blank server, a command line, and a long list of technical terms. It’s enough to make anyone second-guess their decision.
After more than a decade in this industry, I’ve guided hundreds of website owners, just like you, through this exact process. Let me tell you a secret: setting up a VPS is not as hard as it looks. You don’t need to be a server guru or a coding genius. You just need a clear, step-by-step roadmap.
This guide is that roadmap. I’m going to walk you through everything you need to know, from the moment you purchase your plan to the second your website goes live. We’ll cover accessing your server, securing it like a fortress, installing the necessary software, and avoiding the common pitfalls I’ve seen so many times. By the end of this, you’ll not only have a fully functional VPS but also the confidence to manage it like a pro.
What Is VPS Hosting and Why Is It Used?
Before we get our hands dirty, let’s quickly clarify what a VPS is and why it’s such a popular choice. A Virtual Private Server (VPS) is like owning a condo in a large apartment building. You have your own private, partitioned space with dedicated resources (CPU, RAM, storage), but you’re still sharing the larger building (the physical server) with other tenants.
This isolation means that what your “neighbors” do won’t affect your website’s performance. It’s a huge step up from shared hosting, where you’re all in one big room, sharing everything.
Key Differences Between Shared, VPS, and Dedicated Hosting
To put it in perspective, here’s a quick breakdown:
- Shared Hosting: You share a server and all its resources with hundreds, sometimes thousands, of other websites. It’s cheap, but it’s crowded and performance can be inconsistent.
- VPS Hosting: You get a dedicated slice of a server with your own guaranteed resources. It offers a perfect balance of performance, control, and affordability. For a deeper dive, check out this comparison of VPS vs. cloud hosting.
- Dedicated Hosting: You rent an entire physical server. It’s incredibly powerful and secure, but also the most expensive option, usually reserved for large-scale enterprise applications.
Why Businesses and Developers Choose VPS
So, why make the switch? Businesses and developers move to VPS hosting for a few key reasons:
- Performance: Guaranteed resources mean faster, more consistent website load times. This is crucial for user experience and SEO.
- Control: With root access, you can install any software you need and customize the server environment to your exact specifications. This is a game-changer for developers working with tools like Node.js on VPS.
- Security: The isolated environment of a VPS is inherently more secure than shared hosting.
- Scalability: As your website grows, you can easily upgrade your VPS resources without needing to migrate to a new server.
It’s the logical next step for anyone who has outgrown shared hosting and is serious about their online presence.
What Do You Need Before Setting Up VPS Hosting?
Before you can start configuring your server, you need to make one crucial decision: choosing the right plan. This choice will impact your site’s performance and your budget, so it’s worth taking a moment to get it right.
Choosing the Right VPS Plan
The perfect plan is one that meets your current needs with a little room for growth. Don’t fall into the trap of buying the biggest plan available; you’ll just waste money on resources you don’t use. Conversely, a plan that’s too small will lead to a slow website and frustrated visitors. If you need help navigating the options, this guide on how to choose the right VPS plan is a great starting point.
Understanding RAM, vCPU, Storage, and Bandwidth
Let’s demystify the core components:
- vCPU (Virtual Central Processing Unit): This is your server’s brain. For a simple website, 1-2 cores are plenty. For a busy e-commerce store or multiple sites, aim for 2-4 cores.
- RAM (Random Access Memory): This is your server’s short-term memory. It’s vital for handling multiple tasks at once. Start with at least 2GB of RAM. If you’re running a database-heavy application, 4GB or more is a safer bet.
- Storage: This is your server’s hard drive space. The amount you need depends on your website, but the type of storage is more important.
- Bandwidth: This is the amount of data that can be transferred to and from your server. Most plans offer plenty, but check the limits if you host large files or videos.
Why NVMe VPS Provides Better Performance (Highlight SkynetHosting)
When it comes to storage, not all drives are created equal. You’ll see options for HDD, SSD, and NVMe SSD. While traditional SSDs are fast, NVMe (Non-Volatile Memory Express) is the gold standard. NVMe drives connect directly to the motherboard via a high-speed PCIe slot, bypassing the bottlenecks of older SATA connections.
In my experience, a website can load up to 10 times faster on an NVMe VPS compared to one with a standard HDD. The difference is dramatic. Providers like SkynetHosting.net utilize ultra-fast NVMe storage across their VPS plans, which is a huge advantage for performance-critical websites.
How Do You Access Your VPS for the First Time?
Once you’ve purchased your plan, you’ll receive an email with your server’s IP address and login credentials. Now it’s time to log in for the first time. This might feel like the most intimidating step, but it’s quite straightforward.
SSH Access for Linux VPS
If you’re using a Linux VPS (the most common choice), you’ll connect using SSH (Secure Shell). This is a secure protocol that lets you access your server’s command line.
- On macOS or Linux: Open the Terminal application.
- On Windows: You’ll need an SSH client. I recommend the built-in Windows Terminal or a free tool like PuTTY.
The command is simple:ssh root@YOUR_SERVER_IP
Replace YOUR_SERVER_IP with the IP address from your welcome email. The first time you connect, you’ll see a message about the host’s authenticity. Type yes and press Enter. Then, enter the root password you were provided.
RDP Access for Windows VPS
If you chose a Windows VPS, you’ll connect using RDP (Remote Desktop Protocol). This will give you a full graphical desktop interface, just like you’re sitting in front of the server. Many use a VPS as a remote desktop for this reason.
- Search for “Remote Desktop Connection” on your Windows PC.
- Enter your server’s IP address and click “Connect.”
- You’ll be prompted for the username (usually “Administrator”) and password.
Initial Login Commands and Verification
Once you’re logged into your Linux VPS via SSH, it’s a good practice to run a quick check. You can verify your server’s operating system and version with a command like:lsb_release -a
This confirms you’re connected and everything is in order. You now have full control of your server.
How Do You Secure Your VPS Right After Installation?
A brand-new VPS is like a new house with the doors unlocked. Your very first task should always be to secure it. Skipping these steps is one of the biggest mistakes beginners make.

Creating a Sudo User
Logging in directly as the root user is risky. A single typo can cause serious damage. Instead, create a new user with sudo privileges, which lets you run administrative commands without being logged in as root.
- Create the new user (replace
newuserwith your chosen username):adduser newuser - Add the user to the
sudogroup:usermod -aG sudo newuser - Now, log out of your root session (
exit) and log back in as your new user:ssh newuser@YOUR_SERVER_IP
Changing SSH Port and Enabling SSH Keys
Hackers constantly scan the default SSH port (22) for vulnerable servers. Changing it to a non-standard port is a simple and effective security measure. You can also set up SSH keys for passwordless, more secure logins. This is a bit more advanced but highly recommended.
Installing and Configuring UFW or CSF Firewall
A firewall controls incoming and outgoing network traffic. UFW (Uncomplicated Firewall) is a great, user-friendly option for beginners.
- Install UFW:
sudo apt install ufw - Allow SSH traffic (make sure to use your new port number if you changed it):
sudo ufw allow 22/tcp - Allow web traffic:
sudo ufw allow httpsudo ufw allow https - Enable the firewall:
sudo ufw enable
Performing System Updates
Finally, make sure your system’s software is up to date to patch any known security vulnerabilities.sudo apt update && sudo apt upgrade -y
Doing these four things will massively improve your server security.
How Do You Install a Control Panel on Your VPS?
While you can manage everything from the command line, a web hosting control panel provides a graphical interface that makes life much easier. It lets you manage websites, databases, email accounts, and more with a few clicks.
Installing cPanel/WHM
cPanel is the industry standard. It’s robust, reliable, and user-friendly, but it comes with a monthly license fee. The installation is typically a single command provided by cPanel.
Setting Up CyberPanel (Free)
CyberPanel is a fantastic free alternative that integrates with the high-performance OpenLiteSpeed web server. It’s lightweight, modern, and a great choice if you’re on a budget.
Installing DirectAdmin or Plesk
DirectAdmin and Plesk are other popular paid options, each with its own strengths. They are strong competitors to cPanel and offer similar functionality.
Choosing the Right Panel Based on Your Skills
- For Beginners: I often recommend cPanel if the budget allows. Its intuitive interface and extensive documentation make it the easiest to learn.
- For Budget-Conscious Users: CyberPanel is an excellent free choice that doesn’t compromise on performance.
- For Developers: Some developers prefer no panel at all, managing everything from the command line for maximum control.
How Do You Install a Web Server on a VPS?
Your web server is the software that delivers your website’s content to visitors’ browsers. If you installed a control panel, it likely installed a web server for you. If not, you’ll need to install one yourself.

Apache Web Server Setup
Apache is the old reliable. It’s been around for decades, is highly flexible, and has a massive amount of documentation. It’s a solid choice for most websites.
Nginx High-Performance Setup
Nginx (pronounced “Engine-X”) is known for its high performance and efficiency, especially at handling many simultaneous connections. It’s often used for high-traffic sites.
LiteSpeed Enterprise or OpenLiteSpeed
LiteSpeed is a commercial web server that is a drop-in replacement for Apache but offers significantly better performance. OpenLiteSpeed is its free, open-source counterpart and is what powers CyberPanel. In my tests, sites on LiteSpeed can handle traffic spikes with much less CPU and RAM usage.
PHP and Database Configuration
Most modern websites are dynamic, meaning they run on a scripting language like PHP and use a database like MySQL or MariaDB. You’ll need to install and configure these alongside your web server. Your control panel can usually handle this for you.
How Do You Deploy Your Website on a VPS?
With your server set up and secured, it’s time for the exciting part: deploying your website.
Uploading Files via SFTP or FTP
SFTP (Secure File Transfer Protocol) is the most common way to upload your website files. Using a client like FileZilla or Cyberduck, you can connect to your server with your SSH credentials and drag-and-drop your files into the website’s document root (usually a folder like /var/www/html).
Deploying with Git (Recommended for Developers)
For developers, using Git is a much more efficient workflow. You can clone your project repository directly onto the server and pull updates as you make them. This streamlines the deployment process and helps with version control.
Installing WordPress on VPS
If you’re running WordPress, you can install it manually by uploading the files and creating a database. However, many control panels offer one-click installers that automate this entire process, saving you a lot of time. Moving an existing site can be simplified with the right help, as detailed in this guide on how to move a site to VPS hosting.
How Do You Set Up DNS for Your VPS?
Your website is now on the server, but the world doesn’t know how to find it yet. You need to configure your DNS (Domain Name System) to point your domain name to your new server’s IP address.
Pointing Domain Nameservers
The easiest method is to change your domain’s nameservers at your domain registrar (like GoDaddy or Namecheap) to the ones provided by your hosting company. This delegates DNS management to your hosting provider.
Configuring A, AAAA, MX, CNAME Records
Alternatively, you can keep your nameservers at your registrar and just edit the DNS records.
- A Record: This is the most important one. It points your domain (e.g.,
yourdomain.com) to your server’s IPv4 address. - AAAA Record: This points your domain to your server’s IPv6 address.
- MX Record: This handles your email delivery.
- CNAME Record: This creates an alias for a domain (e.g., pointing
www.yourdomain.comtoyourdomain.com).
Checking DNS Propagation
After you make DNS changes, it can take anywhere from a few minutes to 48 hours to propagate across the internet. You can use a tool like dnschecker.org to see if your domain is pointing to the new IP address.
How Do You Configure Databases on a VPS?
Dynamic websites need a database to store content, user information, and more.
Installing MySQL / MariaDB
MySQL is the world’s most popular open-source database. MariaDB is a community-developed fork of MySQL and is often recommended as a drop-in replacement. You can install it with a simple command:sudo apt install mariadb-server
Creating Users and Setting Permissions
You should never use the root database user for your website. Instead, create a dedicated user for each database with specific permissions. This limits potential damage if a website’s security is compromised. Your control panel can make this process very simple.
Securing Remote Database Access
By default, your database server should only be accessible from the server itself (localhost). If you need to connect remotely, make sure you configure your firewall to only allow access from trusted IP addresses.
How Do You Enable SSL and HTTPS on VPS?
An SSL certificate encrypts the connection between your website and your visitors, which is essential for security and trust. It enables HTTPS and gives you that little padlock icon in the browser address bar.
Installing Let’s Encrypt
Let’s Encrypt is a free, automated, and open certificate authority. There is no reason to run a website without SSL today. Tools like Certbot make installing a Let’s Encrypt certificate incredibly easy.
Auto-Renew Scripts
Let’s Encrypt certificates are valid for 90 days. Certbot will automatically set up a cron job or systemd timer to renew your certificates before they expire, so you can set it and forget it.
Fixing Common SSL Errors
If you run into issues, the most common problems are mixed content (loading some assets over HTTP on an HTTPS page) or an improperly configured certificate chain. Most of these can be fixed easily with online tools and guides.
How Do You Optimize VPS Performance for Speed?
Your VPS is set up, but the work isn’t done. Now you can fine-tune it for maximum speed. A faster site leads to better SEO rankings and happier visitors.
Caching Techniques
Caching is the single most effective way to speed up your website. It involves storing pre-generated versions of your content so the server doesn’t have to build them from scratch for every visitor. You can implement browser caching, page caching (via plugins or server configurations), and object caching.
PHP-FPM Optimization
PHP-FPM (FastCGI Process Manager) is an alternative PHP handler that offers significant performance benefits over older methods. Tweaking its settings can help you balance memory usage and performance.
Server-Level Compression
Enabling Gzip or Brotli compression on your server tells it to send smaller, compressed versions of your files to visitors, which speeds up download times.
Selecting the Right Web Server for Speed
As mentioned earlier, your choice of web server has a big impact. LiteSpeed and Nginx are generally faster than Apache out of the box, especially for high-traffic sites. Optimizing your site can lead to much better Google PageSpeed scores with VPS hosting.
How Do You Back Up and Monitor Your VPS?
Your website is a valuable asset. Protecting it with regular backups and monitoring is non-negotiable.
Backup Scheduling Tools
Never rely on a single backup method. Your control panel likely has a backup tool. You can also set up command-line scripts. Most importantly, store your backups on a separate, off-site location (like Amazon S3 or a remote server). A backup stored on the same server that fails is useless.
Server Health Monitoring
Tools like UptimeRobot or StatusCake can ping your website every few minutes and alert you immediately if it goes down.
CPU, RAM, Disk, and Load Tracking
Keep an eye on your server’s resource usage. Tools like htop (for real-time process viewing) and df -h (for disk space) are your friends. High, sustained resource usage is a sign that you may need to optimize your site or upgrade your plan.
What Are Common VPS Setup Problems and How Do You Fix Them?
Even with a guide, you might run into a few bumps. Here are some of the most common issues I’ve seen.
SSH Connection Issues
“Connection timed out” or “Connection refused” usually means a firewall is blocking your connection, the SSH service isn’t running, or you’re using the wrong port number. Double-check your firewall rules and SSH configuration.
DNS Not Resolving
If your domain isn’t pointing to your server after 48 hours, there’s likely a misconfiguration in your DNS records. Double-check your A record at your DNS provider.
Apache/Nginx Failing to Start
This is often caused by a syntax error in a configuration file. Run the configuration test command (apache2ctl -t for Apache, nginx -t for Nginx) to find the exact line causing the problem.
Permission and Ownership Problems
If your website shows a “403 Forbidden” error, it’s often a file permissions issue. Your web server user (like www-data) needs to have read access to the website files.
Why Is SkynetHosting.net the Best Choice for VPS Hosting?
Choosing the right provider can make this entire process infinitely easier. A good host doesn’t just give you a server; they give you a reliable platform and the support you need to succeed.
25 Global Datacenters for Fast Deployment
With SkynetHosting.net, you can deploy your server in a location physically close to your target audience. They have 25 data centers worldwide, which reduces latency and makes your website faster for your visitors.
NVMe VPS with Ultra-Fast Performance
As we discussed, NVMe storage is a game-changer for speed. SkynetHosting.net uses ultra-fast NVMe SSDs in their VPS plans, giving you a significant performance edge over providers still using older SATA SSDs or HDDs. A low-cost VPS server from them still packs a performance punch.
Free Website Migration Assistance
The thought of moving a website can be daunting. SkynetHosting.net offers free migration assistance, where their experts handle the entire transfer for you, ensuring a smooth transition with minimal downtime.
Affordable Plans for Beginners and Agencies
Their plans are competitively priced, making powerful VPS hosting accessible for everyone from beginners to agencies and even specialized users like freelancers reselling VPS hosting. Whether you’re running a personal blog, an online learning platform, or a FinTech app, they have a plan that fits.
24/7 Technical Support for Setup and Troubleshooting
This might be the most important factor. When you’re new to VPS, you will have questions. Knowing that an expert support team is available 24/7 to help you with setup, security, and troubleshooting is invaluable.
Time to Take Control of Your Hosting
Setting up a VPS for the first time is a journey, but it’s one that puts you in complete control of your website’s destiny. You’ve learned how to access your server, lock it down, install software, and deploy your site. You’re no longer at the mercy of a crowded shared server.
A good VPS provider simplifies this process, giving you powerful infrastructure and the support to use it effectively. When you combine the right hosting with the knowledge you’ve gained today, you have a recipe for success.
If you want fast NVMe-powered servers, a global network of data centers, and an expert team ready to help you, the VPS packages from SkynetHosting.net are built for exactly that. They make the setup easier, the performance faster, and the management smoother—perfect for your first VPS adventure.
FAQs
What is VPS hosting, and why choose it?
What do you need before setting up VPS hosting?
How do you access your VPS for the first time?
How should you secure your VPS immediately after installation?
What control panels can be installed on a VPS?
Popular options include paid panels like cPanel/WHM, feature-rich free alternatives like CyberPanel, and others like DirectAdmin or Plesk. Beginners are often advised to use cPanel, while budget-conscious users might prefer CyberPanel for its performance and zero fees.


