How to Add Mods to ASA Dedicated Server – Complete Guide
TL;DR
- Mods in ASA add new content, gameplay features, and customization, enhancing replayability and community engagement.
- Mods are identified by unique Steam Workshop Mod IDs, which you add to your server config files and startup commands.
- Proper server resources (CPU, RAM, storage, bandwidth) are crucial for smooth operation of modded servers.
- Installation involves editing GameUserSettings.ini and Game.ini with Mod IDs, adding them to your server startup command, then restarting the server.
- Keep mods updated using SteamCMD or manual methods; manage load order and backups to maintain server stability and performance.
Understanding Mods and Preparing Your ASA Dedicated Server
Running an ARK: Survival Ascended (ASA) dedicated server is all about control and customization. Unlike official servers, which are limited by fixed settings, a dedicated server allows you to create a personalized experience for yourself and your players. At the heart of this customization lies mods, community-created add-ons that can redefine the way ASA is played. Before we dive into the installation process, it’s important to first understand what mods are, why they’re used, and how to prepare your server properly for them.
What Are Mods in ASA and Why Add Them?

Mods in ASA are game modifications created by the community. They can adjust existing mechanics, add brand-new creatures and items, or even introduce entire game modes. ASA’s Unreal Engine 5 foundation gives mod developers more tools to create high-quality assets and smoother experiences compared to the original ARK: Survival Evolved.
Benefits of Adding Mods to ASA
- Enhanced Gameplay Variety – Mods introduce fresh content such as dinosaurs, weapons, maps, and survival mechanics, ensuring players always have new challenges.
- Quality-of-Life Improvements – Many mods are designed to reduce grind, improve inventory management, or optimize building systems, creating a smoother experience.
- Community Building – A server with a curated set of mods attracts specific audiences, such as PvP fans, roleplay communities, or creative builders.
- Replayability – Regularly adding or rotating mods keeps the game exciting, reducing player burnout.
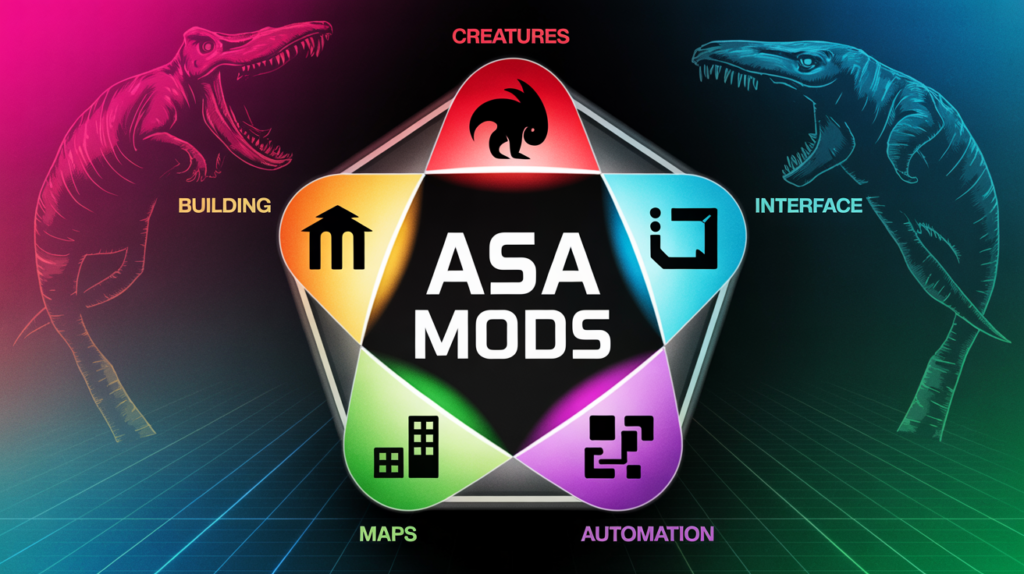
Examples of Popular Mod Categories
- Creature Mods – Add entirely new dinosaurs or mythical creatures.
- Building Mods – Expand construction systems with new materials and designs.
- UI Mods – Redesign menus for better navigation.
- Map Mods – Provide entirely new landscapes to explore.
- Automation Mods – Introduce features like auto-farming, sorting, and resource collection.
Risks and Considerations When Adding Mods
While mods greatly enhance ASA, they are not without drawbacks. Being aware of potential issues helps prevent frustration later.
- Performance Overheads – Larger mods consume more RAM and CPU power, which may cause lag or crashes.
- Compatibility Conflicts – Two mods that change the same system may not work together, causing game-breaking bugs.
- Update Dependency – ASA receives frequent patches, and mods must be updated to remain functional. Outdated mods can break servers.
- Longer Loading Times – Players joining a heavily modded server may face extended initial downloads.
- Version Mismatches – If the server and players have different mod versions, players won’t be able to connect.
Server Requirements and System Resources

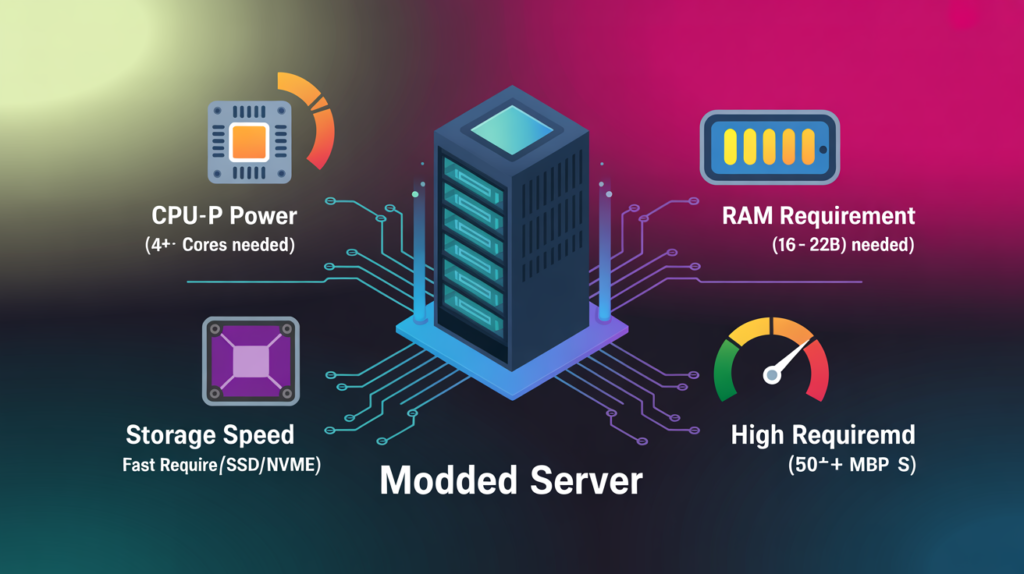
To run mods effectively, your server must have sufficient power. Underpowered servers lead to instability and poor gameplay experiences. Here’s what you should aim for:
- Processor (CPU): At least a quad-core processor, preferably a Xeon or Ryzen with high clock speeds for managing multiple mods.
- Memory (RAM): Minimum 16 GB for smaller servers; 32 GB or more for heavily modded servers or large communities.
- Storage: SSDs or NVMe drives are strongly recommended for faster loading times, especially with multiple large mods.
- Bandwidth: Reliable high-speed internet with strong upload speeds. A minimum of 50 Mbps upload is recommended for small servers, while larger servers may need 100+ Mbps.
- Operating System: Windows Server or Linux, depending on your hosting preference.
If you plan to host multiple mods and want long-term stability, consider renting a dedicated server provider like Skynethosting.net, which offers high-performance hardware optimized for gaming.
Access to Steam Workshop for ASA Mods
All ASA mods are hosted on the Steam Workshop, which acts as the main hub for mod discovery and downloads.
- Create a Steam Account – Required for browsing and subscribing to mods.
- Browse the ASA Workshop – Explore categories like survival, creatures, and maps to find mods that suit your server style.
- Subscribe to Mods – This downloads the mods to your local client, but for servers, you’ll mainly need the Mod ID.
- Copy the Mod ID – Each mod has a unique identifier located at the end of its URL (e.g.,
id=1234567890). This number is essential for installing mods on your ASA server.
Backup Best Practices Before Mod Installation
Before making changes, always safeguard your server. A corrupted installation or incompatible mod can easily wipe progress. Here’s how to protect your data:
- Config File Backup: Copy important files like
GameUserSettings.iniandGame.ini. These hold critical server settings. - World Save Backup: Backup the
SavedArksfolder, which contains player progress, world data, and tribe information. - External Storage: Keep an offsite backup on cloud storage or an external hard drive to avoid total loss in case of corruption.
- Scheduled Backups: Automate daily or weekly backups for added safety.
Installing and Configuring Mods on ASA Dedicated Server
Once you’ve prepared your ASA (ARK: Survival Ascended) dedicated server and understood the basics of mods, it’s time to dive into the actual process of installing and configuring them. Mod installation on ASA requires careful attention to detail, as one small mistake in configuration files or Mod IDs can lead to crashes, loading errors, or broken gameplay experiences. This section walks you through the entire process step-by-step and provides troubleshooting insights to keep your server running smoothly.
Step 1 – Find the Mod ID on Steam Workshop
Every mod for ARK: Survival Ascended hosted on the Steam Workshop has a unique Mod ID. This ID is essential because it tells your server which mod to download and load.
- How to locate the Mod ID:
- Go to the Steam Workshop page for the ASA mod you want.
- Look at the URL in your browser. For example:
https://steamcommunity.com/sharedfiles/filedetails/?id=1234567890
- The number after
id=is the Mod ID (1234567890in this case).
👉 Tip: Always double-check the Mod ID since copying an incorrect ID is the most common cause of failed mod installations.
Step 2 – Edit GameUserSettings.ini and Game.ini Files
Your ASA server has two main configuration files:
- GameUserSettings.ini
- Game.ini
Both files are located in the ShooterGame/Saved/Config/WindowsServer directory (depending on your hosting environment).
- Open these files with a text editor (Notepad++ recommended).
- Add or adjust the lines to include your Mod IDs under the
[ServerSettings]section.
For example:
ActiveMods=1234567890,9876543210,1357924680
This line tells the server to load multiple mods in the given order.
👉 Tip: Always ensure your mod IDs are separated by commas, with no extra spaces.
Step 3 – Add Mod IDs to Command Line or Config Files
Besides editing .ini files, you may also need to add the Mod IDs directly into your server’s startup command line or hosting provider’s control panel.
- Example startup parameter:
ShooterGameServer.exe TheIsland?listen?SessionName=MyServer?ActiveMods=1234567890,9876543210 -server -log
- If you’re using a hosting service, log in to the server control panel and paste the Mod IDs in the dedicated mod section.
👉 Tip: Always keep a copy of your startup line before making changes, so you can roll back if something goes wrong.
Step 4 – Restart the ASA Dedicated Server
After making all the necessary changes, restart your server for the modifications to take effect.
- Use the control panel restart button if you’re on a hosting provider.
- If self-hosting, manually stop the server and relaunch it using the updated command line.
👉 Pro Tip: Some mods take longer to load, so allow extra time during the first restart after adding a new mod.
How to Verify If Mods Are Working on ASA Server
After restarting, you’ll want to confirm that your mods are installed correctly.
In-Game Checks for Active Mods
- Log into your server as a player.
- Check the in-game mod list under settings.
- Verify if new gameplay features (items, creatures, or UI changes) are active.
Server Console Logs and Validation
- Open your server logs (found in the
ShooterGame/Saved/Logsfolder). - Look for lines that confirm mod downloads and loading, e.g.:
Downloading mod 1234567890 from Steam WorkshopMod 1234567890 successfully loaded
If you see errors like “Mod failed to load”, double-check your Mod IDs and configuration syntax.
How to Fix Common Issues with ASA Mods
Even with careful installation, mods may not work as expected. Here are the most common issues:
Why Are Mods Not Loading on My ASA Server?
- Incorrect Mod ID entered.
- Mod not fully downloaded from Steam Workshop.
- Missing
ActiveModsentry in config files.
Solution: Double-check Mod IDs, restart the server, and confirm download logs.
How to Fix Server Crashes After Adding Mods?
- Conflicts between two or more mods.
- Corrupt mod files downloaded.
- Insufficient system resources (RAM/CPU).
Solution:
- Remove mods one by one to identify the culprit.
- Delete and re-download the faulty mod.
- Increase your server’s memory allocation.
How to Solve Mod Version Mismatch Errors?
- Clients and server may have different mod versions.
- Steam Workshop did not update automatically.
Solution:
- Run a SteamCMD update to refresh mods.
- Manually delete and reinstall outdated mods.
Pro Tips for Smooth Installation
- Always install one mod at a time and test before adding more.
- Keep mods updated to avoid version mismatch.
- Join ASA modding forums for support and compatibility reports.
Managing, Updating, and Optimizing ASA Mods
After successfully installing mods on your ASA (ARK: Survival Ascended) dedicated server, the next step is to manage, update, and optimize them for long-term performance. Improper management can lead to crashes, player complaints, and server downtime. This section covers everything you need to ensure your modded server remains stable, efficient, and enjoyable for players.
Automatic Updates via SteamCMD
Keeping mods up-to-date is critical since ASA patches can render old mods incompatible.
- SteamCMD is a command-line tool to automate downloads and updates.
- Example script to update a mod:
steamcmd +login anonymous +workshop_download_item 1234567890 validate +quit
- You can schedule this script to run periodically, ensuring your server always uses the latest mod versions.
👉 Tip: Use the validate flag to detect and fix corrupted or missing files automatically.
Manually Updating Mods
In some cases, automatic updates may fail. Manual updating is straightforward:
- Stop your ASA server.
- Navigate to the
ShooterGame/Content/Modsfolder. - Delete the outdated mod folder.
- Re-download the latest version from Steam Workshop.
- Restart the server.
Manual updates are especially useful when troubleshooting compatibility issues or testing beta versions of mods.
Removing or Disabling Mods
Sometimes, you may need to remove mods due to conflicts or gameplay changes.
- Remove from Config Files: Delete the Mod ID from
GameUserSettings.iniandGame.ini. - Delete Mod Files: Remove the mod folder from the
Modsdirectory. - Restart Server: Always restart the server after removing mods to ensure no leftover data causes errors.
👉 Tip: Keep a backup of your server before removing mods, in case you need to revert.
Best Practices for Load Order and Prioritization
Incorrect mod load order can cause crashes and missing features. Follow these guidelines:
- Core Mods First: Map overhauls, essential gameplay changes, and base mods should load first.
- Utility Mods Later: Mods for inventory management, stacking, or UI changes should load after core mods.
- Conflict Resolution: Always check mod documentation for recommended load order.
Running Multiple Mods Without Conflicts
- Avoid installing mods that modify the same game mechanics.
- Look for compatibility patches provided by mod creators.
- Test mods in a private or staging server before making them live.
- Communicate with your player base about new mods to reduce confusion.
Choosing Stable and Popular Mods
- Stick to mods with high ratings and frequent updates.
- Check forums and Steam Workshop reviews for bug reports.
- Avoid mods that have been abandoned by developers, as they may cause future incompatibility with ASA updates.
Long-Term Server Stability Strategies
- Regular Backups: Keep daily or weekly backups of both mods and world saves.
- Monitor Logs: Regularly check server logs for errors related to mods.
- Test Updates in Staging: Always test ASA and mod updates on a separate server before applying to your live server.
- Limit Heavy Mods: Too many high-resource mods can degrade performance.
Hosting Solutions for Modded ASA Servers
Running multiple mods requires robust server hosting. Consider providers like Skynethosting.net:
- High RAM & CPU Servers: Handle multiple mods efficiently.
- SSD Storage: Reduces load times and improves gameplay performance.
- 24/7 Support: Technical assistance for mod or server issues.
Using a reliable host ensures smooth performance, faster mod downloads, and a better experience for your players.
Final Checklist and Tips
- Back up all configs and world saves before changes.
- Install mods gradually and test extensively.
- Use SteamCMD or manual updates to maintain mod versions.
- Keep load order and compatibility in mind to prevent crashes.
- Choose stable, community-supported mods.
- Monitor server performance and logs for ongoing optimization.
- Consider a high-performance hosting provider to reduce downtime.
By following these strategies, your ASA dedicated server will remain stable, engaging, and enjoyable for your players. Mod management is not just about installing mods, it’s about creating a sustainable, customized gaming environment that evolves with your community.
FAQs
What are mods in ASA, and why add them?
Mods are community-created game modifications for ARK: Survival Ascended. They add new creatures, items, and gameplay features. Including mods enhances replayability, introduces quality-of-life improvements, and helps build unique server communities for a more dynamic and engaging player experience.
How do you prepare your ASA server for mods?
Start by ensuring your server has adequate resources—high-performance CPU, enough RAM, fast SSD storage, and strong bandwidth. Always back up config files and world saves before installing mods to avoid data loss if compatibility or performance issues occur.
How do you find and use Mod IDs for ASA?
Mods are available on the Steam Workshop. Each mod’s URL contains a unique Mod ID, found after “id=”. Copy this number and include it in your server’s configuration files and startup command to activate the desired mods for your gameplay.
What is the step-by-step process to install mods?
Edit GameUserSettings.ini and Game.ini files, add the Mod IDs, and update your server’s startup command or control panel with these IDs. Once changes are complete, restart the ASA server for mods to load and become active.
How can you verify installed mods are working?
Log in as a player and check the in-game mod list, or look for new items and features. You can also review server logs for lines that confirm mod downloads and loading, or errors that suggest configuration issues or failed installations.
What are common modding issues and solutions?
Problems may include mods not loading, server crashes, or version mismatches. Solutions involve double-checking Mod IDs, updating mods through SteamCMD, removing conflicting mods, and ensuring server and client versions match for consistent multiplayer experience.
What tips help maintain mod stability long-term?
Back up configs and saves regularly, install and test mods one at a time, always keep mods updated, monitor server logs, and select stable, frequently updated mods. Using a reliable server provider optimizes performance and reduces player downtime.


