How to Install WHMCS: A Quick 5-Step Guide Guide
TL;DR:
- Purchase and download WHMCS, then upload the files to your server. (Or get free from Skynethosting.net)
- Use the installation wizard to set up the platform, configure company details, payment gateways, and email templates.
- After setup, your WHMCS instance is ready to manage billing, support, and automation for your hosting business.
- SkyNetHosting.net offers step-by-step installation guides and free WHMCS with select hosting packages.
Getting your hosting business automated and streamlined may seem like a daunting task, but with the right tools, it’s entirely within reach. WHMCS is one such tool that empowers web hosting providers, freelancers, or small businesses to manage billing, support, and automation with ease.
If you’re wondering how to set up WHMCS from scratch, you’re in the right place. This guide will take you through all the steps you need, from preparation to installation to post-setup fine-tuning.
And if you use our reseller plans at Skynethosting.net, we’ve got great news for you—we offer WHMCS for free with all our plans while many competitors charge for it. Stick around to learn more about that in the conclusion!
What is WHMCS and Why Use It?
WHMCS (Web Host Manager Complete Solution) is a powerful software tool that simplifies web hosting businesses by handling client management, billing, and support. It’s a must-have for hosting businesses looking to work efficiently and reduce administrative burdens.
With WHMCS, you can:
- Automate billing and invoicing.
- Configure client portals for end-user support.
- Manage domains and hosting services with ease.
Whether you’re just getting started or scaling up, WHMCS ensures you stay on top of the game with professional service. Learn more in our What is WHMCS – Complete Guide.
Prerequisites to Get Started
Before hopping into the installation process, make sure you have the following in place:
- An active WHMCS license
You can purchase a license directly from WHMCS or get it for free when you pick one of our reseller hosting plans.
- A supported server environment
Ensure your hosting account meets the system requirements. Typically, you’ll need:
- PHP 7.4 or later
- MySQL 5.1 or later
- Extensions such as PDO, cURL, JSON, MBString.
- A domain name with cPanel access
This is where your WHMCS platform will be hosted.
- FTP client software
Tools like FileZilla or Cyberduck will help you upload files easily.
Got that all set? Then, you’re ready!
How to install WHMCS in 5 steps
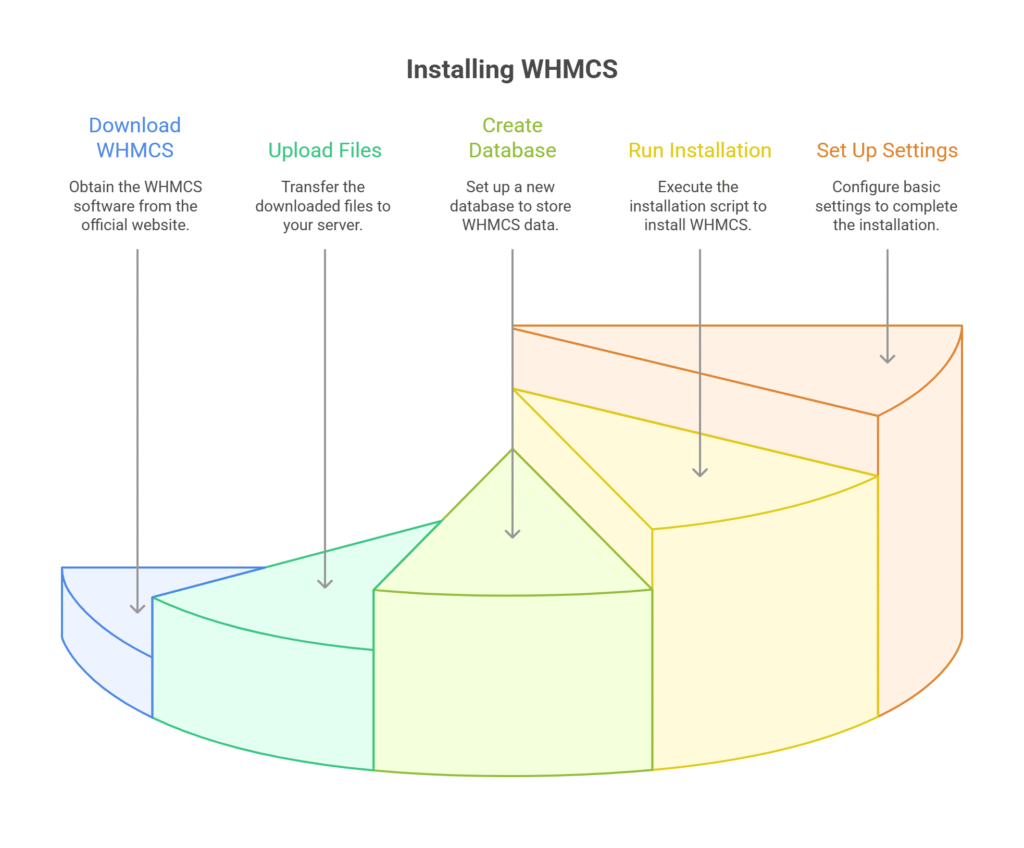
Step 1: How to Download WHMCS
To download WHMCS, follow these steps:
- Log in to the WHMCS Client Area: Go to the WHMCS website and log in to your account using your credentials.
- Access the Download Link: Once logged in, navigate to the section where you can download the WHMCS installation files. Look for the option to download the latest version to ensure you have the most up-to-date features and security updates.
- Locate Your License Key: Your license key will be available in your client area. Make sure to note it down or keep it handy, as you will need it during the installation process.
By following these steps, you’ll be ready to start installing WHMCS with ease..
Step 2: Upload Files to Your Server
To set up WHMCS on your hosting server, follow these steps:
- Open your FTP client and connect to your hosting server using your username and password.
- Locate the WHMCS installation package on your computer and upload it to a folder within your domain (e.g.,
www.example.com/whmcs/). - Important: Only unzip the installation package after it has been fully uploaded to your server. Unzipping it beforehand can cause errors during the upload process.
Step 3: Create a New Database
To set up WHMCS, you’ll first need to create a new database in your hosting control panel (such as cPanel). Follow these steps:
- Log in to your hosting control panel.
- Navigate to the MySQL Databases section.
- Create a new database:
- Enter a name for your database and click “Create.” Be sure to write down the database name for later.
- Create a new database user:
- Assign a username and password for this new user, then save these details (you’ll need them during setup).
- Link the user to your new database:
- Assign the user to the database you just created and set their permissions to All Privileges to allow full access.
You’ll use the database name, username, and password during the WHMCS installation process, so keep this information handy..
Step 4: Run the Installation Script
To begin installing WHMCS, open your browser and navigate to the WHMCS installation folder. For example, if your site is hosted at www.example.com, visit www.example.com/whmcs/install. The system will automatically detect that you’re starting the setup process.
Here’s what to do next:
- Review and accept the license agreement to proceed.
- Provide the database details you saved earlier during the setup. This connects WHMCS to your database.
- Enter your WHMCS license key when prompted. This ensures your installation is validated.
Once these steps are completed, the installation process will finish, and you’ll see a success message confirming everything has been set up correctly..
Step 5: Set Up Basic Settings
After logging into your new WHMCS admin area (using the admin URL from the setup success message), it’s time to configure the basics to get your system running smoothly. Here’s where to start:
- General Settings: Customize key details like your company name, contact information, website integration, and email settings to ensure everything aligns with your business branding.
- Client Area Settings: Adjust the look and feel of your client area to create a professional, user-friendly experience for your customers.
Pro Tip: Double-check your timezone settings to avoid scheduling errors—no one wants to deal with appointments or system tasks that are 12 hours off!!
Post-Installation Steps
You’re almost there! To ensure everything runs smoothly, complete the following steps after installation:
How Set Up Cron Jobs
Cron jobs handle automatic tasks like sending invoices and reminders.
Set them up via your cPanel or server terminal, following the cron command provided during installation.
Configure Payment Gateways
Head to the “Setup” menu in your admin area and configure payment gateways such as PayPal or Stripe. This ensures seamless payment processing for your clients.
Brand and Customize
Make your WHMCS portal stand out by:
- Adding your logo.
- Choosing a theme or color palette consistent with your brand.
It’s your customer front-end; make it stylish.
Troubleshooting Common Issues in WHMCS
If something isn’t working as expected, don’t panic. Here are common issues and their solutions:
- Installation Error
The installation cannot proceed because the necessary permissions are not granted..
Troubleshooting:
- Ensure the
/configuration.phpfile is writable. - Set the correct file permissions (e.g.,
chmod 777temporarily). - Retry installation and reset permissions after completion.
- Invalid License Key
The error indicates that the license key you are using is either incorrect or not valid. This could mean you entered the key incorrectly, the key has expired, or it does not match the product or service it is intended for..
Troubleshooting:
- Verify the key is correct and corresponds to the product.
- Obtain a valid key from WHMCS or your hosting provider.
- Re-enter the key in the license settings.
- Blank Pages
This issue is likely caused by errors in the PHP code or a mismatch between the PHP version being used and the version required by the application. Compatibility problems can occur if the code relies on functions or features not supported by the current PHP version..
Troubleshooting:
- Check error logs for details (
/logs/folder or server logs). - Confirm your PHP version meets software requirements.
- Enable error reporting for more insights.
- Update PHP or software as needed.
For more detailed troubleshooting, visit the official WHMCS documentation.
The Next Step in Hosting Automation
Congratulations! You’ve successfully installed and configured WHMCS. Whether you’re just embarking on your hosting business or scaling it up, WHMCS will undoubtedly ease your operations.
For those who wish to explore WHMCS before fully committing, you can check out the free WHMCS demo to experience its features firsthand. This is a great way to understand how WHMCS can simplify your hosting management processes.
Want to take it one step further? At Skynethosting.net, we offer free WHMCS licenses with all our reseller hosting plans. While most other providers charge extra for this essential tool, our plans come with it at no additional cost. This allows you to start automating your hosting business instantly without breaking the bank.
Check out our reseller hosting plans today and get WHMCS for free. It’s hosting automation done right.
FAQ
What is WHMCS and why do I need it?
WHMCS (Web Host Manager Complete Solution) is an all-in-one client management, billing, and support solution for web hosting businesses. It helps automate tasks like invoicing, account provisioning, and customer support, saving you time and effort.
Do I have to pay extra for a WHMCS license with Skynethosting.net?
No, all our reseller hosting plans include a free WHMCS license. Unlike other providers that charge additional fees, we provide it at no extra cost. This makes it easier and more affordable for you to start automating your hosting business.
How does WHMCS benefit my hosting business?
WHMCS streamlines your operations by automating key processes like service provisioning, billing, and customer management. This reduces manual work and minimizes errors. It also provides a professional experience for your clients, helping you manage your business more efficiently.
Is the free WHMCS license included with all Skynethosting.net plans?
Yes, every reseller hosting plan at Skynethosting.net comes with a free WHMCS license. This allows you to get started immediately without the additional cost of purchasing the license separately.
How can I learn more about your reseller hosting plans?
You can explore our reseller hosting plans, their features, and pricing details by visiting our website. All plans come with free WHMCS licenses to ensure you have a seamless start to your hosting business.

