
How to Install & Configure cPanel on Your VPS: Complete Guide
TL;DR
- cPanel runs best on a fresh AlmaLinux 8/9, Rocky Linux 8/9, or Ubuntu 20.04 VPS with sufficient CPU, RAM, disk, root SSH access, and a valid license, plus a properly configured hostname.
- Before installation, update the OS, set a Fully Qualified Domain Name hostname, ensure SSH and basic ports are open, and disable NetworkManager so networking does not conflict with cPanel.
- Installing cPanel is mostly automated: install curl, download the latest installer script into /home, run it, and wait 15–45 minutes for the system to configure services and dependencies.
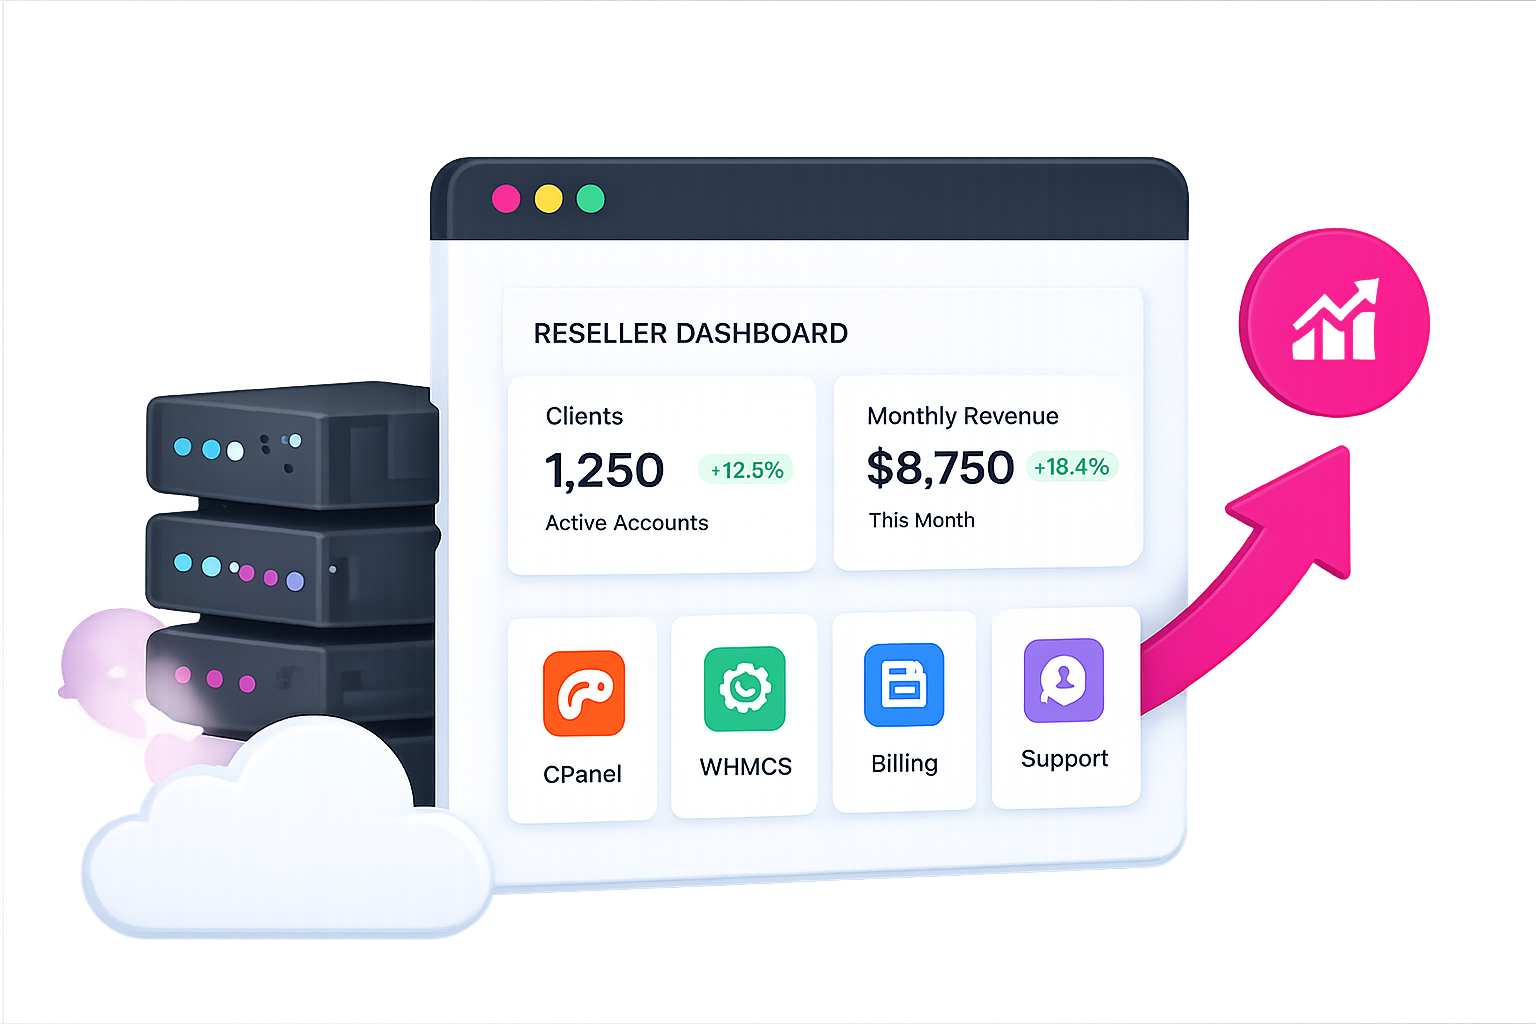
- After installation, access WHM over HTTPS on port 2087, accept the license, set contact details, configure IP and nameservers, then finalize basic networking and DNS settings.
- Post‑install hardening includes enabling automatic updates, configuring off‑server backups, turning on brute‑force protection (cPHulk), using a firewall such as CSF, and securing SSH with a non‑default port and key authentication.
- To host sites, create packages and accounts in WHM, then optimize services (Apache/LiteSpeed, PHP, MySQL) and monitor resources so the VPS stays stable as more cPanel users are added.
So, you’ve got yourself a VPS, and now you’re staring at a black terminal screen wondering how to turn it into the powerful hosting management system you know and love. I’ve been there. Installing cPanel on a VPS can feel a bit like performing open-heart surgery if you’ve never done it before. One wrong command, and you might feel like you’ve broken everything.
But here’s the good news: it’s actually a lot more straightforward than it looks.
In my 10 years of managing servers, I’ve installed cPanel hundreds of times. I’ve seen every error message, every license glitch, and every DNS headache imaginable. Today, I’m going to walk you through the exact process I use. No jargon, no guesswork—just a clear, step-by-step path to getting your cPanel and WHM (Web Host Manager) up and running.
Whether you’re setting up a server for a client or launching your own hosting business, by the end of this guide, you’ll have a fully functional cPanel VPS ready for action.
Let’s get your server sorted.
What You Need Before Installing cPanel on a VPS
Before we type a single command, we need to make sure your environment is actually ready for cPanel. This software is robust, but it’s also picky. Trying to install it on an unsupported OS or a weak server is a recipe for disaster.
Supported operating systems
cPanel doesn’t run on just anything. In the past, CentOS 7 was the gold standard, but with its end-of-life status, the landscape has shifted. Today, cPanel & WHM supports Linux-based operating systems.
For the best stability and support, you should use AlmaLinux OS 8 or 9, Rocky Linux 8 or 9, or Ubuntu 20.04 LTS.
Personally? I stick with AlmaLinux or Rocky Linux. They are excellent, enterprise-grade replacements for CentOS and play very nicely with cPanel.
Minimum hardware requirements
Don’t try to squeeze cPanel onto a tiny server. It needs room to breathe.
- Processor: Minimum 1.1 GHz
- RAM: 1 GB is the absolute minimum, but honestly? You need at least 2 GB to keep things smooth. If you plan on hosting multiple accounts, aim for 4 GB.
- Disk Space: Minimum 20 GB (but 40 GB is recommended).
cPanel licensing basics
Unlike some open-source panels, cPanel is paid software. You cannot finish the setup without a valid license.
You can install the software first and buy the license later, but you won’t be able to access the interface until that license is active. You can purchase a license directly from cPanel or, often more cheaply, through a partner like Skynethosting.net when you buy your VPS.
Root SSH access and hostname setup
You need full administrative power. This means you must have root access to your VPS via SSH (Secure Shell). Sudo access isn’t enough for the initial installation script; you need to be the actual root user.
Also, have a hostname in mind. This is usually something like server.yourdomain.com or vps.yourdomain.com. It needs to be a Fully Qualified Domain Name (FQDN) that doesn’t match any website you plan to host on the server (e.g., don’t name the server google.com if you aren’t Google).
How to Prepare Your VPS for cPanel Installation
Okay, let’s get our hands dirty. Before running the installer, we need to prep the operating system. Think of this as laying the foundation before pouring the concrete.
Choosing AlmaLinux or Rocky Linux
If you are just deploying your VPS now, look for the OS selection menu. Select a clean installation of AlmaLinux 8/9 or Rocky Linux 8/9.
Crucial tip: Ensure you are installing on a fresh OS. cPanel cannot be uninstalled. If you have other software, websites, or databases already on this VPS, the cPanel installer will likely fail or wipe them. Always start fresh.
Updating the operating system
Once you are logged in as root via SSH (using PuTTY or your terminal), the first thing you must do is update the current packages.
Run this command:
yum update -y
This ensures all security patches and kernel updates are applied. If the kernel updates, it’s a good practice to reboot the server before continuing:
reboot
Setting a valid server hostname
Your server needs to know its own name. If your hostname isn’t set correctly, cPanel might throw a fit later.
Run this command to set it (replace vps.yourdomain.com with your actual hostname):
hostnamectl set-hostname vps.yourdomain.com
Configuring basic firewall rules
cPanel handles its own firewall (CSF is a popular plugin we’ll talk about later), but during installation, you need to make sure basic ports are open so you don’t get locked out.
Most default VPS installations are fine, but ensure that Port 22 (SSH) is open. cPanel will eventually need ports 2087 (WHM) and 2083 (cPanel) open, but the installer usually handles the heavy lifting here.
Also, disable Network Manager, as it interferes with cPanel’s network configuration:
systemctl stop NetworkManagersystemctl disable NetworkManager
How to Install cPanel on a VPS Step by Step

Now for the main event. The installation process is surprisingly automated. We are essentially going to download a script and let it do the hard work.
Downloading the cPanel installer
First, make sure you have curl installed, as we need it to grab the installation script.
yum install curl -y
Next, move to your home directory:
cd /home
Running the installation command
This is the command that starts the magic. Copy and paste this into your terminal:
curl -o latest -L https://securedownloads.cpanel.net/latest && sh latest
This command downloads the latest stable version of cPanel & WHM and runs it using the shell (sh).
Installation time and system behavior
Now, go grab a coffee. Maybe two.
The installation takes anywhere from 15 to 45 minutes, depending on your server’s internet speed and processing power.
You will see hundreds of lines of text scrolling by. Do not close the terminal window. Do not disconnect your internet. Just let it run. It is downloading packages, compiling software, and setting up databases.
Verifying successful installation
You’ll know it’s done when the scrolling text stops and you see a message that looks like this:
Congratulations! Your installation of cPanel & WHM 11.110 is now complete.
It will also give you a URL to log in, which usually looks like: https://Your-Server-IP:2087
How to Complete the Initial cPanel & WHM Setup

The command line part is over. Now we move to the web browser to configure the server.
Accessing WHM for the first time
Open your browser and type in https://Your-Server-IP:2087.
Note: You will likely see a “Your connection is not private” warning. This is normal because the server is using a self-signed SSL certificate right now. Click “Advanced” and “Proceed” (or “Accept Risk”).
Log in using the user root and your root password.
Accepting license and activation
The first screen you see acts as the legal agreement. You need to read and accept the terms.
If you have already purchased a license for this IP address, cPanel will automatically detect it and activate it. If you haven’t, you might see a trial offer or a prompt to purchase one.
Network and IP configuration
WHM will ask for some networking details. Usually, the default detected IP address is correct.
You’ll need to input the contact details (an email address) where the server should send critical alerts. Use a real email here. If your server is under attack or a drive is failing, you want to know immediately.
Nameserver and DNS setup
This is the part that confuses most people. WHM will ask for nameservers (e.g., ns1.yourdomain.com and ns2.yourdomain.com).
These nameservers act as the “directory” for domains hosted on your server. If you don’t have these registered yet, you can enter them here anyway, but you will need to go to your domain registrar (where you bought your domain) and register these nameservers with your VPS IP address later.
How to Configure cPanel for Performance and Security
A fresh cPanel install is functional, but it’s not secure or optimized. Let’s tighten things up.
Enabling automatic updates
cPanel updates frequently to patch security holes.
In WHM, search for Update Preferences. Make sure your release tier is set to RELEASE (this is the stable version). I recommend setting cPanel & WHM updates to Automatic. You don’t want to be running an outdated version when a new vulnerability is discovered.
Setting up backups
I cannot stress this enough: Set up backups immediately.
Search for Backup Configuration in WHM.
- Enable Backups: default is off. Turn it on.
- Backup Destination: Do not store backups on the same drive as your websites. If the drive fails, you lose everything. Use Amazon S3, Google Drive, or a remote FTP server.
Configuring firewall and brute-force protection
cPanel comes with a tool called cPHulk. Search for “cPHulk Brute Force Protection” and enable it. This blocks IP addresses that try to guess your passwords repeatedly.
For a firewall, I highly recommend installing ConfigServer Security & Firewall (CSF). It’s free and integrates perfectly into WHM. It’s much more robust than the default settings and gives you a visual interface to manage open ports.
Securing SSH and root access
By default, SSH usually runs on port 22. Hackers know this.
In your SSH configuration (you can edit this via the terminal at /etc/ssh/sshd_config), change the port from 22 to something random, like 2244.
Also, disable Password Authentication and use SSH Keys instead if you are comfortable with that. It makes brute-forcing your server nearly impossible.
How to Create Hosting Accounts and Packages
Your server is ready, but you can’t host a website yet without an account.
Creating hosting packages
Before creating a user, create a “Package.” A package defines the limits (disk space, bandwidth).
- Go to Packages -> Add a Package.
- Name it something like “Basic Plan” or “Gold Plan.”
- Set the Disk Quota (e.g., 5000 MB) and Bandwidth (e.g., 20000 MB).
Adding user accounts
Now, go to Account Functions -> Create a New Account.
- Enter the domain name (e.g.,
clientwebsite.com). - Create a username and strong password.
- Choose the Package you just created.
- Click Create.
Boom. You now have a live cPanel account where you can upload files and create emails.
Disk, bandwidth, and resource limits
Be careful with “Unlimited” settings. If you give a user unlimited disk space, one rogue backup script can fill your entire server hard drive, crashing the system for everyone else. Always set reasonable limits.
How to Optimize cPanel on a VPS
Out of the box, cPanel is configured for compatibility, not speed. Let’s make it fast.
Tuning Apache or LiteSpeed
Apache is the default web server. It’s reliable but memory-hungry.
In WHM, go to Apache Configuration -> Global Configuration. Here you can tweak the MaxRequestWorkers limit.
However, if you want real speed, consider switching to LiteSpeed Web Server. It’s a paid add-on, but it is significantly faster than Apache and handles high traffic with ease.
PHP version management
Go to MultiPHP Manager. Ensure the system default PHP version is current (like PHP 8.1 or 8.2).
Then, go to MultiPHP INI Editor. Increase the memory_limit from the default (often 32M or 128M) to something more robust like 256M or 512M to prevent “Out of Memory” errors on WordPress sites.
Database optimization
MySQL/MariaDB needs optimization. You can use the generic configurations, but editing the /etc/my.cnf file allows you to adjust the innodb_buffer_pool_size. A good rule of thumb is setting this to about 60-70% of your available RAM if the server is dedicated to databases, or less if it shares resources with web traffic.
Resource monitoring inside WHM
Use the Process Manager and Show Current Disk Usage tools in WHM regularly. If you see the server load constantly above 1.0 (per CPU core), you need to upgrade your VPS or optimize your sites.
Common cPanel Installation Errors and Fixes
It doesn’t always go smoothly. Here are the most common hiccups I see.
Installation stuck or failed
If the installer stops, check your internet connection. If it failed, read the log file it points to. Usually, a failure is due to:
- Installing on an unsupported OS (like an old CentOS 6).
- Running out of RAM during installation (upgrade your VPS).
License activation problems
If you log in and see a license error, run this command in SSH to force a check:
/usr/local/cpanel/cpkeyclt
This forces the server to talk to the cPanel licensing servers and refresh the status.
Hostname or DNS misconfiguration
If your emails aren’t sending, it’s almost always a hostname or RDNS (Reverse DNS) issue. Ensure your hostname resolves to your server IP, and ask your VPS provider to set the RDNS record for your IP to match your hostname.
When You Should Use Managed cPanel VPS Hosting
We just went through a lot of steps. For some, this is exciting. For others, it’s a headache.
Time and skill considerations
Managing a cPanel VPS isn’t a “set it and forget it” task. You need to monitor logs, handle updates, and fix services when they crash at 3 AM. Do you have the time for that?
Risks of unmanaged servers
If you mess up a security setting, you could get hacked. If you delete a critical file, you could lose data. Unmanaged hosting puts all that responsibility on you.
Cost vs responsibility comparison
Unmanaged VPS is cheaper, yes. But if you calculate the hours you spend fixing server issues, the cost of a Managed VPS is often lower than your hourly rate.
Why Skynethosting.net Is Ideal for cPanel VPS Hosting
If you want the power of a VPS without the constant fear of breaking it, this is where we come in.
cPanel-ready VPS environments
At Skynethosting.net, our VPS environments are optimized specifically for cPanel. We use NVMe storage which makes cPanel interface loading times lightning fast. You don’t have to worry about hardware compatibility.
Managed and unmanaged options
We offer flexibility. If you want to be the root admin and do everything yourself, grab our unmanaged plans. But if you want us to handle the installation, security updates, and monitoring, our managed support is top-tier.
Expert server support
We’ve been in business for 20 years. We’ve seen every cPanel evolution. When you host with us, you aren’t just renting a server; you’re getting access to a team that can fix that obscure error message in minutes, not days.
Conclusion
Installing cPanel on your VPS is a rite of passage for many server admins. It gives you incredible control over your web hosting environment.
Final checklist for cPanel installation
- Start with a fresh OS (AlmaLinux or Rocky Linux).
- Set a valid Hostname.
- Run the installation script.
- Activate the license.
- Secure SSH and configure the firewall.
- Set up automatic backups immediately.
Best practices after setup
Don’t stop learning. Keep an eye on your resource usage and keep your software updated. Security is a continuous process, not a one-time setup.
Choosing the right VPS for cPanel
Ultimately, your cPanel experience is only as good as the hardware it sits on. Don’t skimp on RAM and storage. If you’re ready to deploy a high-performance VPS with 24/7 expert backing, check out the plans at Skynethosting.net. We’d love to help you host your next big project.
FAQs
What are the minimum requirements to run cPanel on a VPS?
You need a supported Linux OS (ideally AlmaLinux 8/9, Rocky Linux 8/9, or Ubuntu 20.04), at least 1–2 GB RAM, around 20–40 GB storage, a modern CPU, root SSH access, and an IP‑based cPanel license tied to your server.
Why must cPanel be installed on a fresh operating system?
cPanel assumes full control of system services like Apache, PHP, MySQL, and DNS. Installing on a used or customized VPS risks conflicts and data loss. Because cPanel is effectively non‑removable, starting from a clean OS image avoids broken configurations and unreliable behavior.
How do I actually run the cPanel installation on my VPS?
After logging in as root, update the OS, install curl, switch to /home, then download and execute the installer using the standard “curl … && sh latest” command. The script handles package installation and setup, usually completing within 15–45 minutes uninterrupted.
How do I access WHM and complete the initial setup?
Once installation finishes, open https://your-server-ip:2087 in a browser, bypass the self‑signed SSL warning, and log in as root. Accept the license, enter an alert email, confirm IP details, and configure nameservers so domains hosted on the VPS resolve correctly.
What security steps should I take immediately after installing cPanel?
Enable automatic cPanel updates, configure remote backups, turn on cPHulk brute‑force protection, and install a firewall such as CSF. Then change the SSH port, harden SSH authentication with keys, and restrict unnecessary access to reduce common attack surfaces on the VPS.
How do I start hosting websites once cPanel is installed?
In WHM, create hosting packages defining disk, bandwidth, and limits, then use “Create a New Account” to add domains, assign a package, and generate credentials. Each account gets its own cPanel where users can upload files, manage email, and configure applications.


